
Ingredients
- 1INGREDIENTS FOR 1 kg fresh pasta
- • For the carrot Purée:
- • 250 grams carrots washed, cleaned, lightly scraped
- • 2 beetroots boiled and peeled (reserve separately from the carrots)
- • For the Dough:
- • ½ kg Maida or all purpose flour
- • 3 whole eggs whisked
- • 2 egg yolks whisked (Read ‘Here’s What You Can Do With Leftover Egg Whites’)
- • 1 teaspoon kitchen salt
Instructions
- Steam carrots until very soft and tender. Mash thoroughly and pass through a fine food mill or a sieve to ensure there are no lumps. If the puree has too much liquid cook it in a non-stick pan until it loses moisture. It should be a soft, fluffy mash.
- For the Dough: In a large, parat or thali used for making chappati dough pour flour in a mound. If you prefer you can also work directly on a flat, clean surface like your counter top or a wooden table. Make a well in the center of the flour about 3-4 inches wide. Sprinkle flour with a teaspoon of salt. Whisk eggs and carrot puree together then pour into the center well. Slowly incorporate flour into the eggs until you get a wet, sticky mix. Then using your fingers knead to form a shiny light orange-colored dough.
- If dough is sticky add more flour, a little at a time until the dough is smooth and rolls off your hand easily.
- Press the heel of your hand into the ball of dough, pushing your weight forward and downwards. Turn the dough over and knead again about 3-5 minutes. Continue until dough develops a shiny, elastic texture. When you push your finger into the center of the ball of dough your finger should come out clean. If the dough is too dry add a few drops of water, a little at a time and continue to knead.
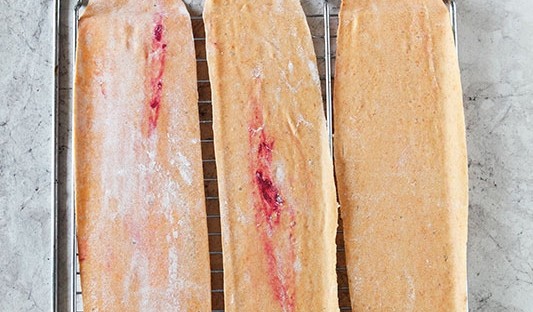
- Rub your hands over the beet allowing the red color to stain your palms and fingers. Knead the carrot pasta again rubbing in the ruby color into the light orange dough. Repeat this 3-4 times.
- When you have a marbled effect you are happy with reserve the beet for the sauce.
- Cover or wrap ball of dough tightly in plastic wrap and rest at room temperature in a cool dry place for 20 minutes. “If you are making this pasta dough during the monsoon you will require more flour as the air is heavy with moisture.” Turn on a fan and open a window to allow for ventilation. “If the weather is cold- say a Delhi winter you will need less flour and your pasta will dry out faster.”
- “Pasta must not be allowed to dry or harden before it is rolled and cut.”
- Rolling the Pasta: Generously flour a dry clean surface. Divide dough into 3 equal parts. Keep one wrapped in plastic. Knead dough again a few times. With a rolling pin, flatten the dough into a roughly round shape about 1/2 inch thick.
- TO ROLL AND STRETCH DOUGH BY HAND:
- Roll the pasta from the center out ensuring that the middle doesn’t get too thin. Flour surface again and flip the dough to the other side. Flour regularly as you roll to ensure pasta dough doesn’t stick.
- Continue rolling until you have a large and wide circle about 10 inches wide for one portion of dough. Keep flouring as required. The pasta shouldn’t stick to any surface. Using one palm to weigh the pasta down stretch the opposite end very gently in a slow and dragging motion. This should be repeated with the other side of the dough also. If this is too complicated you can simply thin the dough by rolling it.
- The motion is similar to rolling a chappati. The key is to have a dough that’s evenly thick. The thickness of the dough can vary. If you like a thick cut pasta, roll it about 1/5 inch thick and 1/6-1/7th inch for a thinner, finer pasta.
- At all times remember the pasta should not tear, break or thin out too much anywhere.
- Picture 2
- TO ROLL USING A MACHINE
- Roll every one of the 3 pieces of dough into an oblong shaped circle about 4-5 inches long and 3-4 inches wides using a rolling pin on a well-floured and clean surface. Keep covered with plastic wrap or a moist cloth.
- Set pasta maker to widest setting and pass piece of dough twice through the machine at this setting.
- Then pass it through again at a medium thick setting twice.
- It will get longer and thinner.
- Narrow the setting again and roll the dough through the blades again. Repeat this sequence until the dough is the thickness you want.
- By the time you get to the thinnest setting on your machine the dough should now be delicate, smooth and a little stretchy in appearance, almost translucent.
- Place rolled dough onto a work surface or baking sheet lightly dusted with flour or lined with parchment or wax paper.
- Cover dough with plastic wrap or a clean, slightly damp kitchen towel to prevent drying, then repeat with remaining dough. If the weather is humid use plastic wrap or a dry cloth.
- The pasta sheets must be cut before they dry.
- To Cut Noodles by Hand-
- Roll the rolled dough into a tube- you will need to roll it over approximately 3-4 times. Don’t press down on it, roll it loosely. I use a pizza wheel to slice my dough but you can also use a plain, sharp kitchen knife to slice the roll into vertical strips. The Italians have a guitar shaped tool called a Chittara that’s great for ribbon pasta. You can also use a non-serrated pastry wheel. I often use a ruler to first mark the pasta and then support my pizza or pastry wheel so I can ensure the strips are evenly cut.
- Picture 3
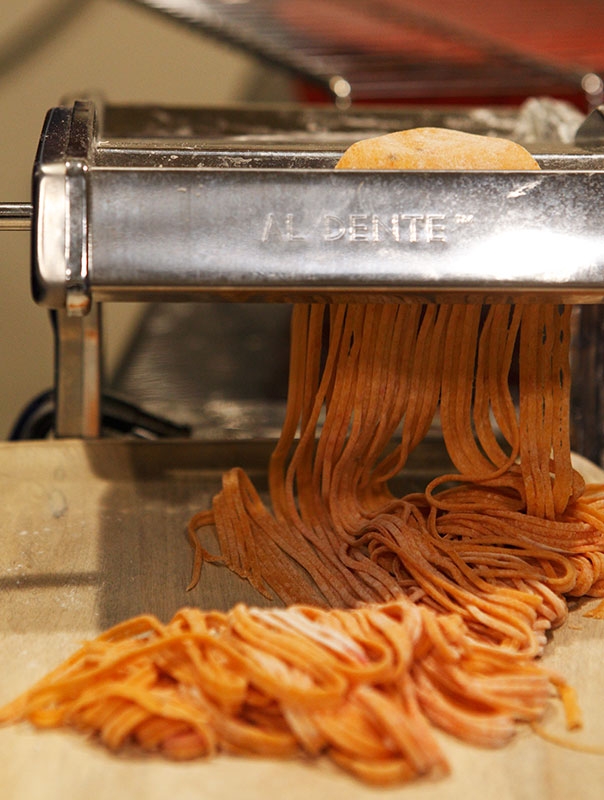
- To Cut Noodles by Machine: Adjust pasta machine to noodle setting you prefer, in this case Angel Hair but you can do any other ribbon cut also. Work with one piece of dough at a time. Hold it up with both palms. Handle carefully so it doesn’t tear. Fit one end of it in the center of the rolling blade while holding the tail end securely so the pasta rolls evenly.
- Dust pasta noodles lightly with flour, and make 4 individual mounds on a dry plate or baking tray if you plan to cook them immediately. If you want to dry them hang the strands out on a pasta rack, (I’ve even used a clothes drying rack) for about one hour. I don’t recommend freezing fresh pasta or refrigerating it in order to dry it.
- Fresh ribbon pasta shouldn’t be frozen it defeats the purpose- you may as well buy it at a store.
- Picture 4
- To Cook: Bring a large stockpot or pateela of water and a half teaspoon of salt to a bubble. “The pot must be spacious so as to allow the pasta to cook easily without sticking to each other.”
- Add all the pasta, stir gently with a pasta tong or chappati tongs to separate noodles, you can also use a large fork. Cook about 1 1/2 to 2 minutes. The thicker the pasta and the drier, the longer it will take to cook. You will need to pull out a noodle from time to time and take a bite to see how well it’s done.
- Pasta should be al dente (to the tooth) when its served, just a bit undercooked with a little resistance when you bite into it.
- Pasta should ideally be undercooked a minute, drained and tossed in a pan of hot sauce to complete the cooking. This allows the pasta to absorb the flavors of the sauce. In India’s warmer clime pasta cooks faster so I undercook mine by a minute and a half. This way by the time its been tossed with a hot sauce and carried to the dining table its still al dente.
© 2024 All content copyright: Tara Deshpande